お風呂の蛇口を交換してみよう!
![](https://okiresi.com/wp-content/uploads/2023/11/f3a90f45c6296b746bba45e588997dcc.jpg)
現在住んでいる物件のお風呂にちょっとした不満が…、
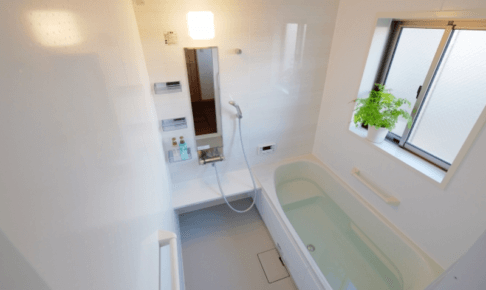
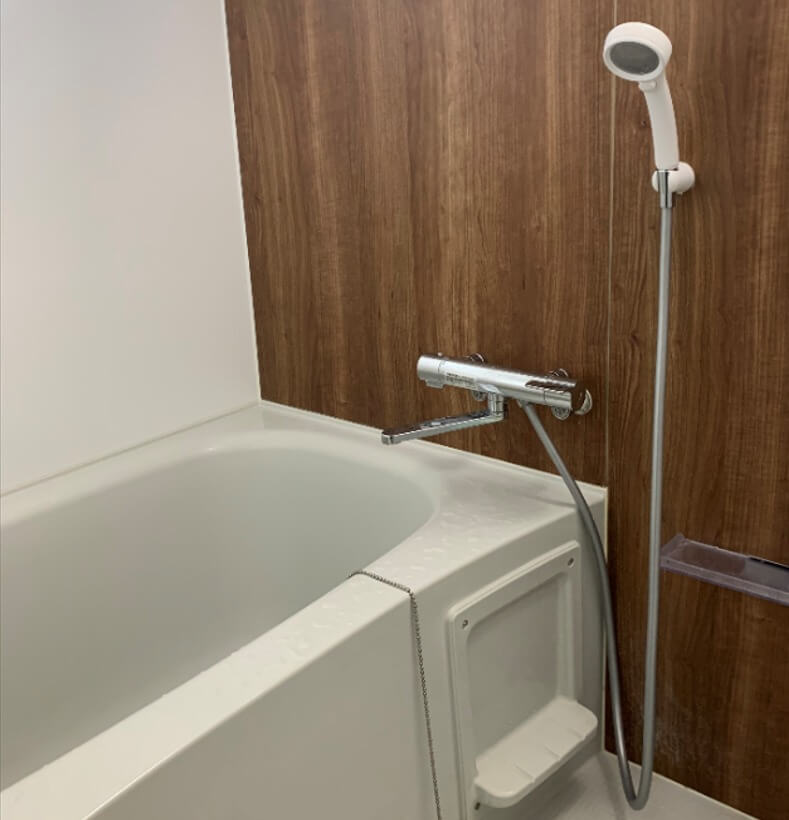
![](https://okiresi.com/wp-content/uploads/2019/01/白子猫.png)
BEFORE(交換前)
![](https://okiresi.com/wp-content/uploads/2020/11/732b2052c470fbb3647024e8b138a2f8-e1604451124907.jpg)
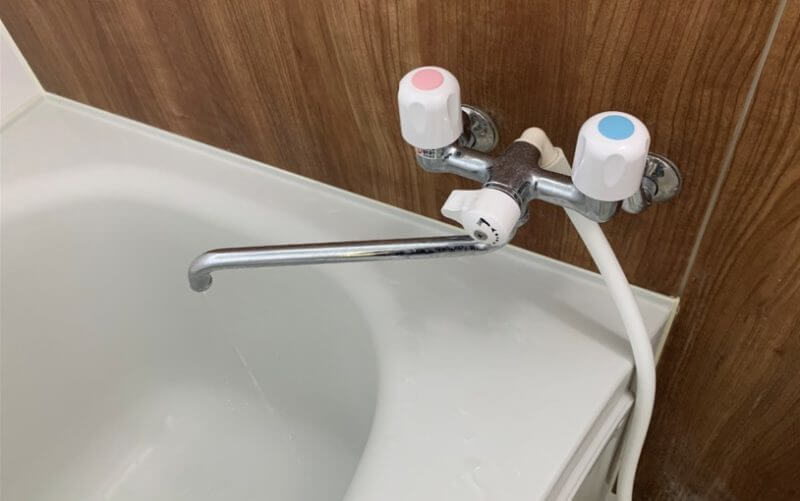
お風呂ってほぼ毎日入るし、風呂水栓って使用頻度がめっちゃ高い…、はず(汗)
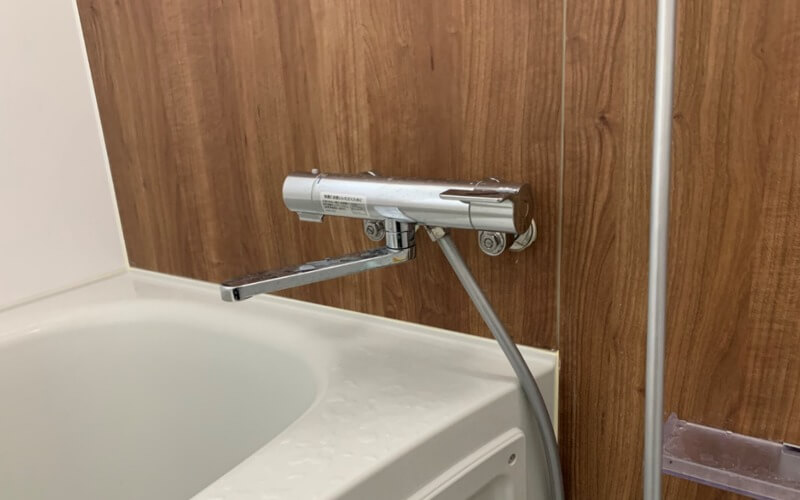
![](https://okiresi.com/wp-content/uploads/2019/01/白子猫.png)
AFTER(交換後)
![](https://okiresi.com/wp-content/uploads/2020/11/TOTO-TBV03401J.jpg)
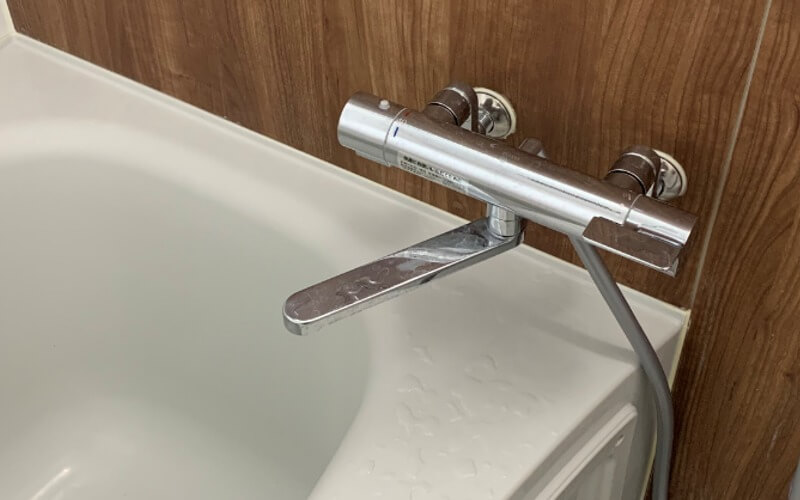
そこで今回は、自分で簡単にお風呂場の水栓をサーモスタット式のカッコいいヤツに交換できる手順をご紹介!
![](https://okiresi.com/wp-content/uploads/2019/01/白子猫.png)
ではでは、早速いってみましょう!
サーモスタット式混合水栓を購入しよう!
![](https://okiresi.com/wp-content/uploads/2020/11/1ced033848ef0c8e86f6f710fdc74893-e1604387612622.jpg)
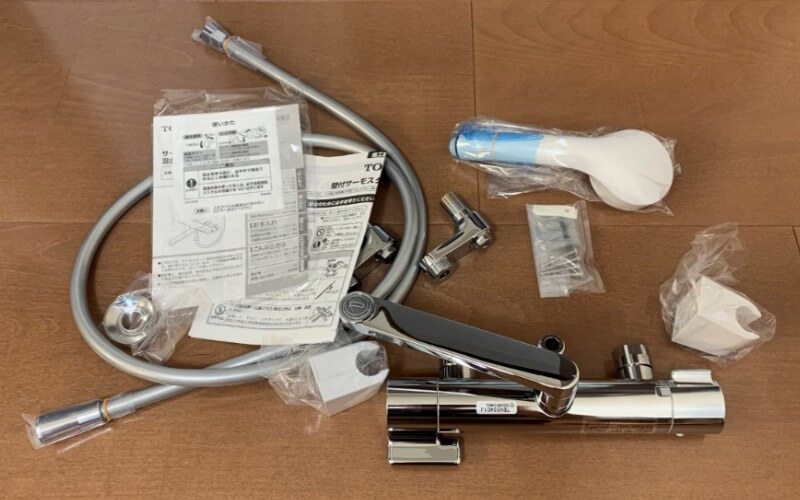
蛇口交換をするには、まず新しい蛇口を準備する必要があります…、
![](https://okiresi.com/wp-content/uploads/2019/01/白子猫.png)
![](https://okiresi.com/wp-content/uploads/2016/09/-e1545881487896.png)
まぁ、色々と調べてみると「TOTOの製品が高評価」&「水回りはTOTOが間違いない!」ってオススメされていた事から…、
![](https://okiresi.com/wp-content/uploads/2019/01/白子猫.png)
アマゾンでもカテゴリ「浴室水栓」でベストセラー1位の製品…、多分大丈夫でしょう^^
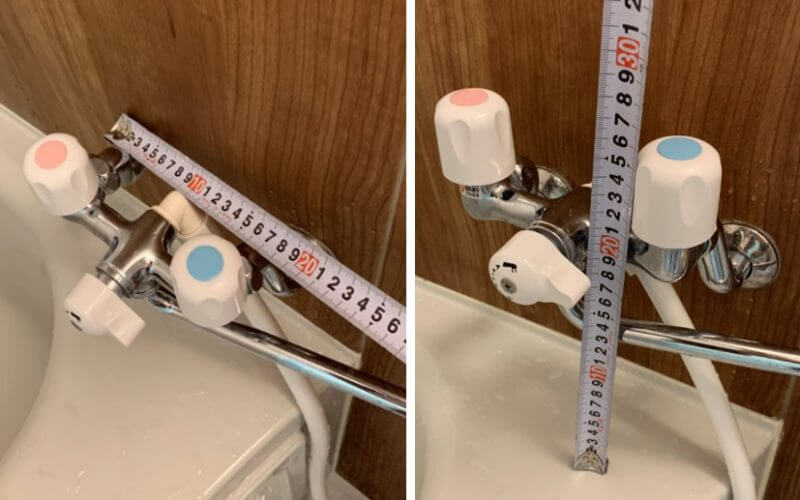
![](https://okiresi.com/wp-content/uploads/2020/11/TBV03401J-1024x408.png)
● 取り付けタイプ:壁付き水栓
☑ 段差や隙間が少ないので掃除がしやすく、高級感あるデザインが魅力です
☑ 気に入った温度のお湯をすぐに出すことができるサーモスタット付きシャワー水栓
![](https://okiresi.com/wp-content/uploads/2019/01/白子猫.png)
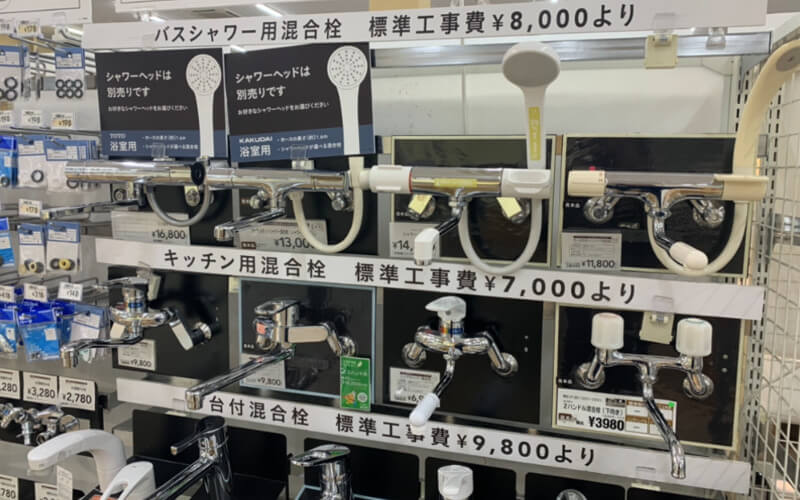
普通に一万円超え…、金属部品って意外と高いです(汗)
![](https://okiresi.com/wp-content/uploads/2020/11/TBV03401J-1.jpg)
お風呂の蛇口を簡単に交換する手順
![](https://okiresi.com/wp-content/uploads/2020/11/9389b5ce75499cb0defbaba9230e9161.jpg)
![](https://okiresi.com/wp-content/uploads/2019/01/白子猫.png)
何かとお金がかかるこのご時世、「節約できるものは節約したい!」って事で、自分で蛇口交換をしてみました^^
![](https://okiresi.com/wp-content/uploads/2020/11/5604d1bbff41c0430261932166fe1bfc.jpg)
![](https://okiresi.com/wp-content/uploads/2019/01/白子猫.png)
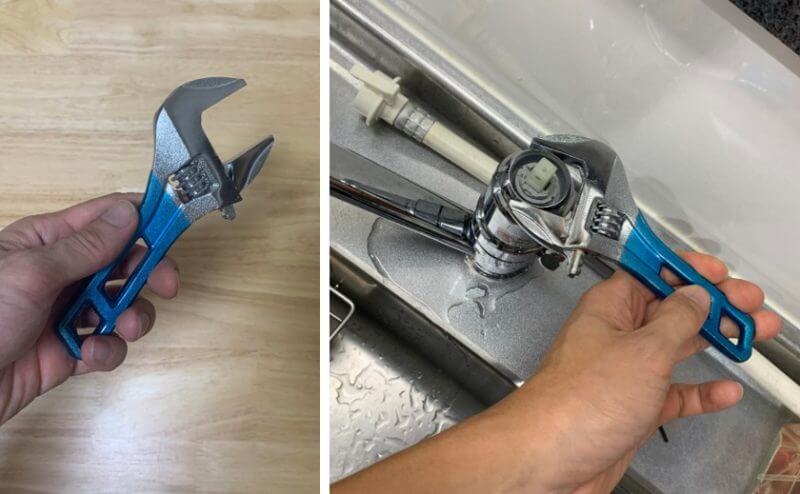
「モンキーレンチ」は、以前から愛用している「高儀(Takagi)のショートワイドモンキー」があったので問題なし◎
![](https://okiresi.com/wp-content/uploads/2020/11/40e48bf4829ff2808ba72d1b6365e0a5-e1604458714805.jpg)
![](https://okiresi.com/wp-content/uploads/2019/01/白子猫.png)
道具を揃えたら、いよいよ実際の取付手順(方法)に入ります…、
① 水栓(元栓)を閉める
![](https://okiresi.com/wp-content/uploads/2020/10/9d16a3a3b15699196a4048b0865dc2a6.jpg)
まずは家の水道の元栓を閉めます…、
![](https://okiresi.com/wp-content/uploads/2019/01/白子猫.png)
時計回りに回して、水道の元栓をしっかり締めましょう!
② 古い蛇口&取り付け脚を取り外す
続いて古い蛇口の本体を取り外します
![](https://okiresi.com/wp-content/uploads/2019/01/白子猫.png)
![](https://okiresi.com/wp-content/uploads/2020/11/666ed7d1d3ce72762c351915fbdb9f74-e1604388492172.jpg)
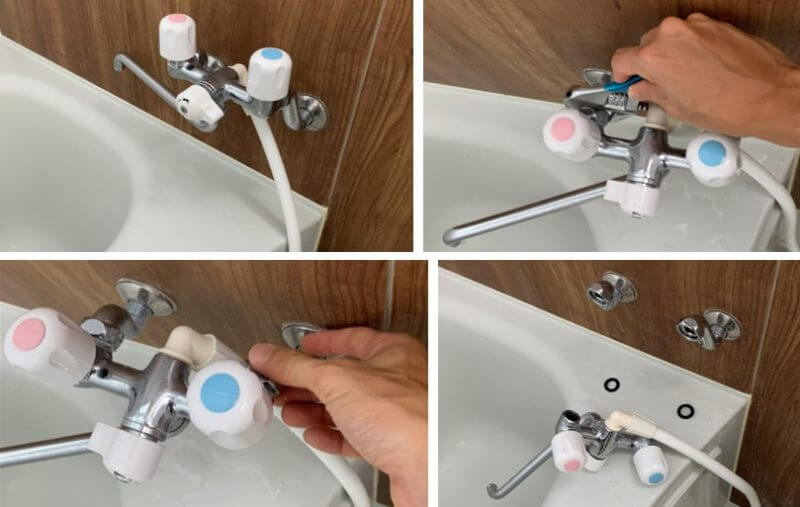
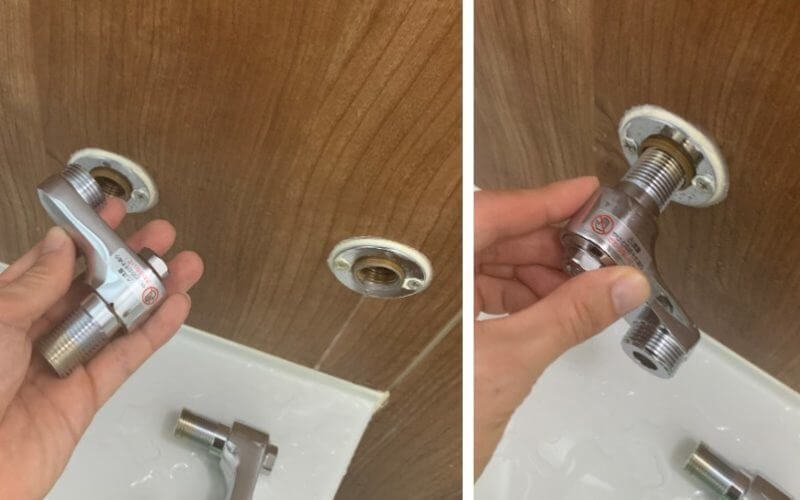
お次は古い取り付け脚を、反時計回りに回して取り外していきます
![](https://okiresi.com/wp-content/uploads/2019/01/白子猫.png)
![](https://okiresi.com/wp-content/uploads/2020/11/3da229434518b424e51d7d54d66aa6bb-e1604389223432.jpg)
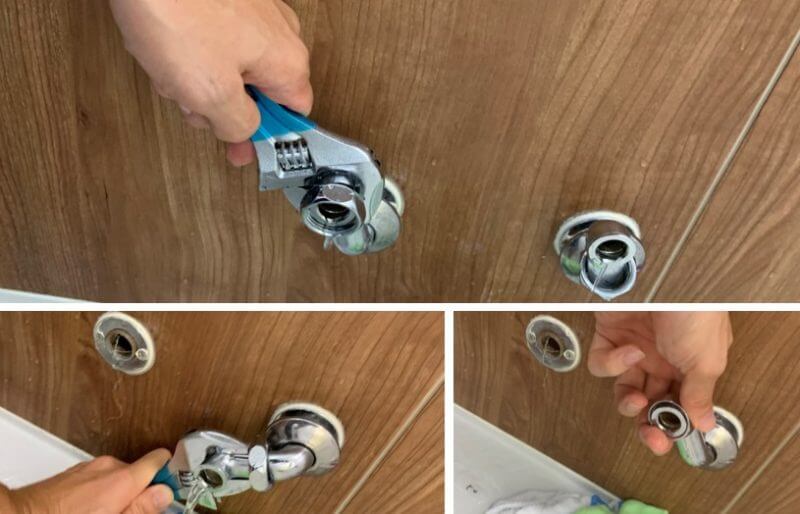
グッと緩めて、手回しで外していきます…、
![](https://okiresi.com/wp-content/uploads/2019/01/白子猫.png)
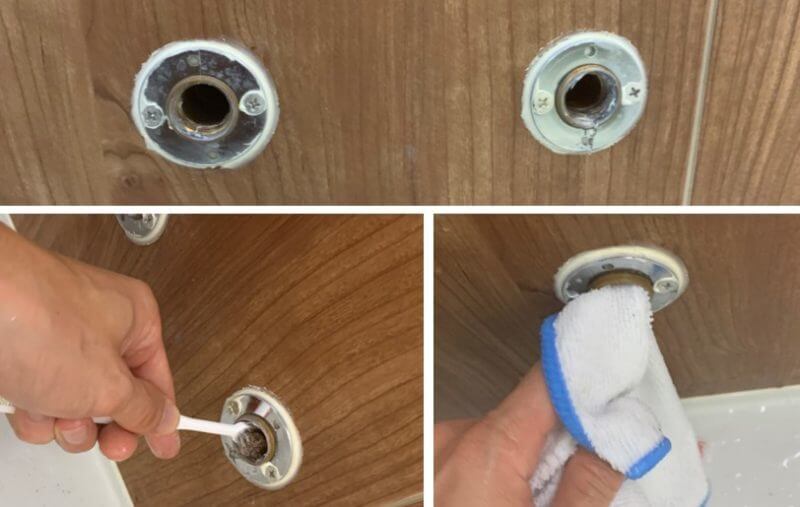
古い取り付け脚が外れたら、使い古しの歯ブラシを使って配管に残っているシールテープや汚れを掃除します!
![](https://okiresi.com/wp-content/uploads/2020/11/bb96e6575f4f7ea0a41b68064af93f21-e1604460019318.jpg)
![](https://okiresi.com/wp-content/uploads/2019/01/白子猫.png)
③ 新しい取り付け脚&蛇口を取り付ける
新しい取り付け脚に交換する際に注意ポイントが2つあります!
注意ポイント①
シールテープを巻いた新しい取り付け脚は、必ず時計回りに回して設置する事
![](https://okiresi.com/wp-content/uploads/2020/11/NG.jpg)
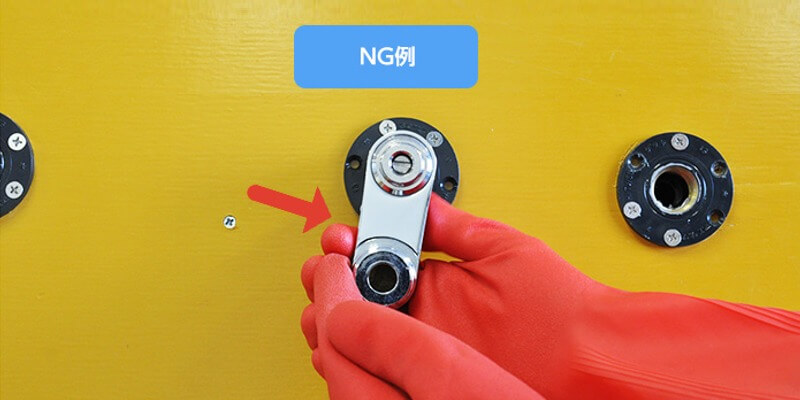
反時計回りに回してしまうと、シールテープが上手く機能せずに水漏れの原因になります(汗)
その際は、シールテープを巻き直す必要(やり直し)になるので注意です(泣)
なので、初めに新しい取り付け脚を手回しで取り付けてみて、何回転でキツク締まるかを確認します…、
![](https://okiresi.com/wp-content/uploads/2019/01/白子猫.png)
![](https://okiresi.com/wp-content/uploads/2020/11/6a48eb273ff7b53a7eee3626fdd3138d-e1604463102563.jpg)
ちなみに、自分の場合は4回転目くらいからキツクなりました(汗)
![](https://okiresi.com/wp-content/uploads/2019/01/白子猫.png)
ココで、2つ目の注意ポイントです!
注意ポイント②
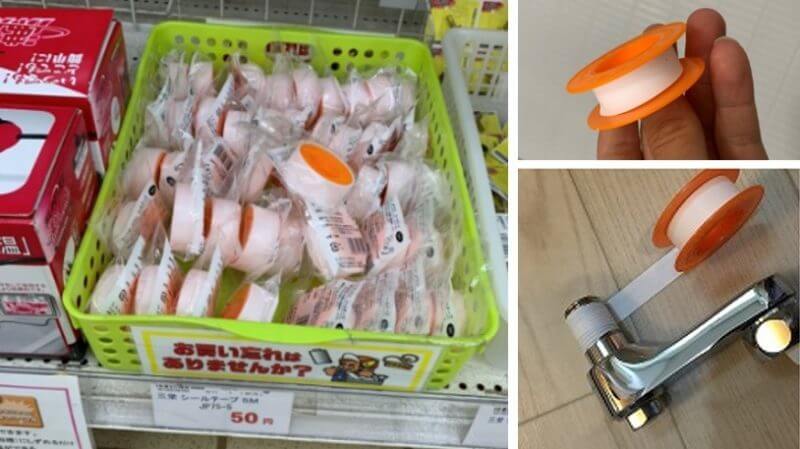
シールテープを巻く際は、先端から離して巻き始め、反時計回りに巻かない事
![](https://okiresi.com/wp-content/uploads/2020/11/f73ed2e011770bf1ab243a41462768d7-e1604462158236.jpg)
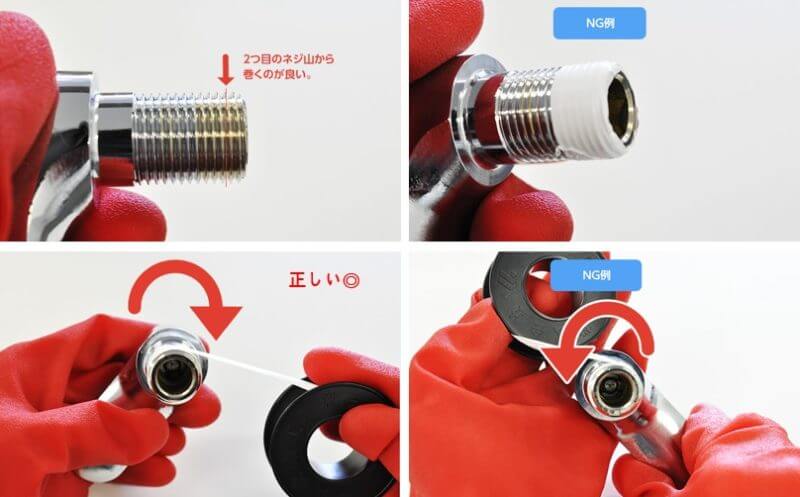
また、ネジ山に沿って指で馴染ませる際に、爪を立てない事
![](https://okiresi.com/wp-content/uploads/2020/11/a973af42bbb8a32fd60138f597ea0370-e1604462733931.jpg)
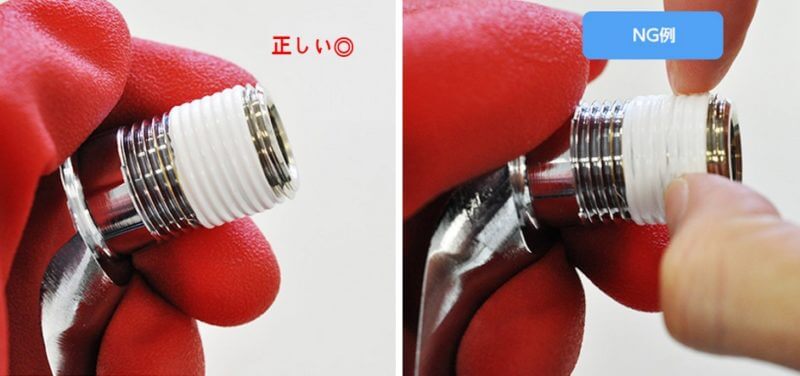
力が強すぎるとシールテープを破いてしまうため水漏れの原因となります(泣)
巻きつけたら、配管に新しい取り付け脚を差し込み、時計回りに手で回していきます…、
![](https://okiresi.com/wp-content/uploads/2019/01/白子猫.png)
![](https://okiresi.com/wp-content/uploads/2020/11/2dc705815d57880a50f7945d35ba9b58-e1604537139131.jpg)
この時も、反時計回りに回さないよう注意です!
![](https://okiresi.com/wp-content/uploads/2019/01/白子猫.png)
蛇口本体を取り付けていくのですが、左 ⇒ 右の順に取り付け、蛇口本体が水平になるようにします
![](https://okiresi.com/wp-content/uploads/2020/11/27b41b25f120beafe15991a9c31f5457-e1604536679743.jpg)
![](https://okiresi.com/wp-content/uploads/2019/01/白子猫.png)
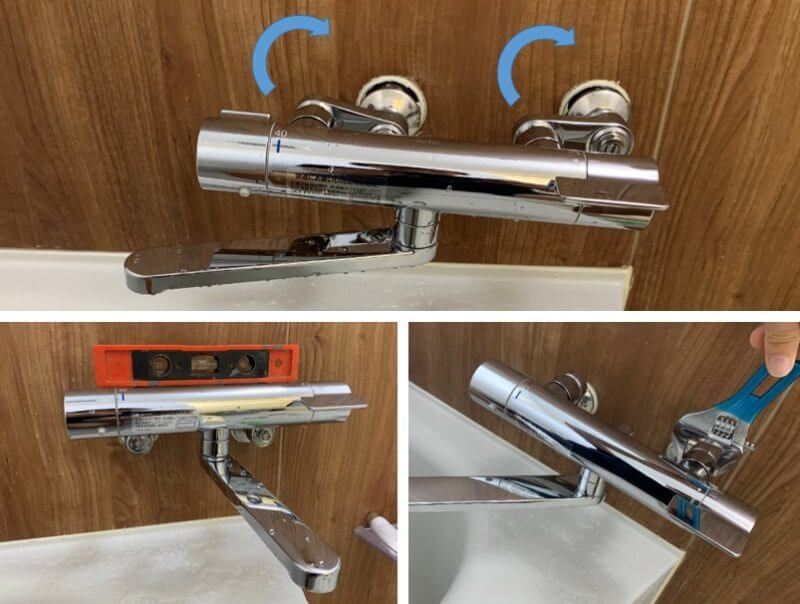
本体が水平になったら、レンチでしっかりと固定すればOKです◎
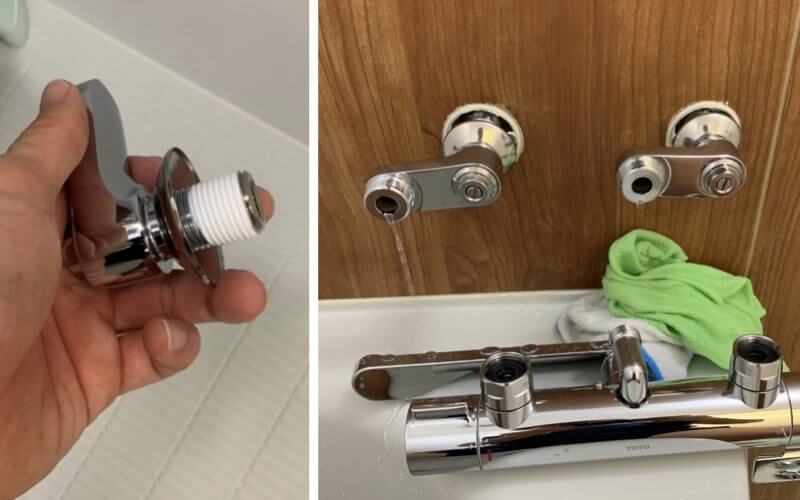
④ シャワーホースを接続する
![](https://okiresi.com/wp-content/uploads/2020/11/970637649c626c8a20c9352dd81cdfb3-e1604626046954.jpg)
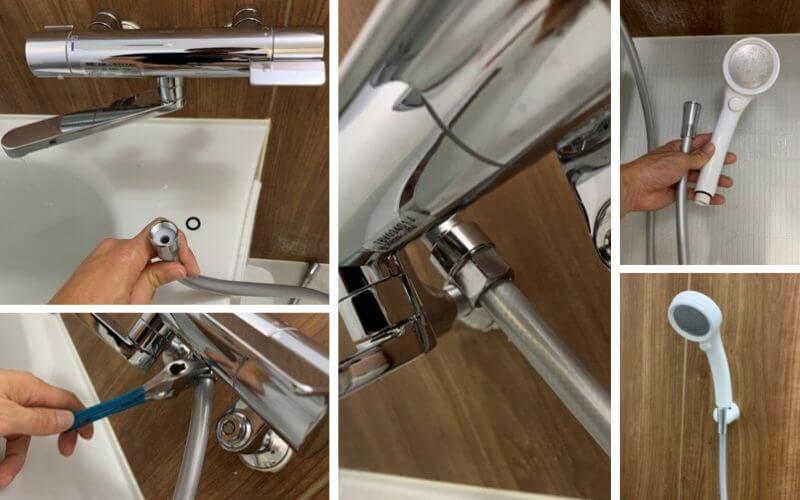
新しい蛇口に付属しているシャワーホース、シャワーヘッドを取りつけます
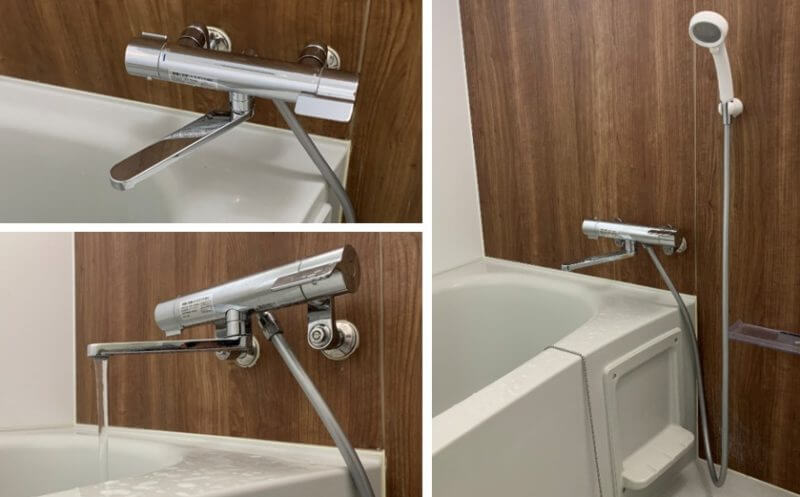
![](https://okiresi.com/wp-content/uploads/2019/01/白子猫.png)
![](https://okiresi.com/wp-content/uploads/2018/05/レイニーがオススメ.png)
⑤ 設置完了
![](https://okiresi.com/wp-content/uploads/2019/01/白子猫.png)
交換作業はこれにて完了!
![](https://okiresi.com/wp-content/uploads/2020/11/93262337342d87187704bf91bdc54e5c-e1604535188372.jpg)
実際に取り替えて感じたのですが、「モンキーレンチ」は小さい目の方が小回りが利くので使い易いと思います^^
![](https://okiresi.com/wp-content/uploads/2020/10/f473203b89ed7d9d122b3e1116f2d4a1-e1604447993466.jpg)
![](https://okiresi.com/wp-content/uploads/2019/01/白子猫.png)
最後に
![](https://okiresi.com/wp-content/uploads/2020/11/b511e05275b23eba3c9cbd7c7d6161ee.jpg)
実際に使用(3年経過で不具合無し!)してみて感じたのですが、お風呂ライフがめちゃくちゃ快適になりました(驚)
![](https://okiresi.com/wp-content/uploads/2019/01/白子猫.png)
もうお風呂タイムが楽しみで仕方がないです^^
![](https://okiresi.com/wp-content/uploads/2020/11/28b64629a9cc62a51957a5769f912658.jpg)
ちょっと高価ではありますが、お風呂は毎日入るので、水栓と言えどもお金をかけて大正解◎
![](https://okiresi.com/wp-content/uploads/2019/01/白子猫.png)
冬の寒い時期に”安定した温度のお湯”が得られるありがたさ…、冗談抜きでオススメです!
ちなみに2022年に、長年愛用していた「レイニー」から高級シャワーヘッド「リファファインバブル S」に更新しちゃいました ↓
![](https://okiresi.com/wp-content/uploads/2022/02/450a9e3f3e2757b7ed297720b162f20a.jpg)
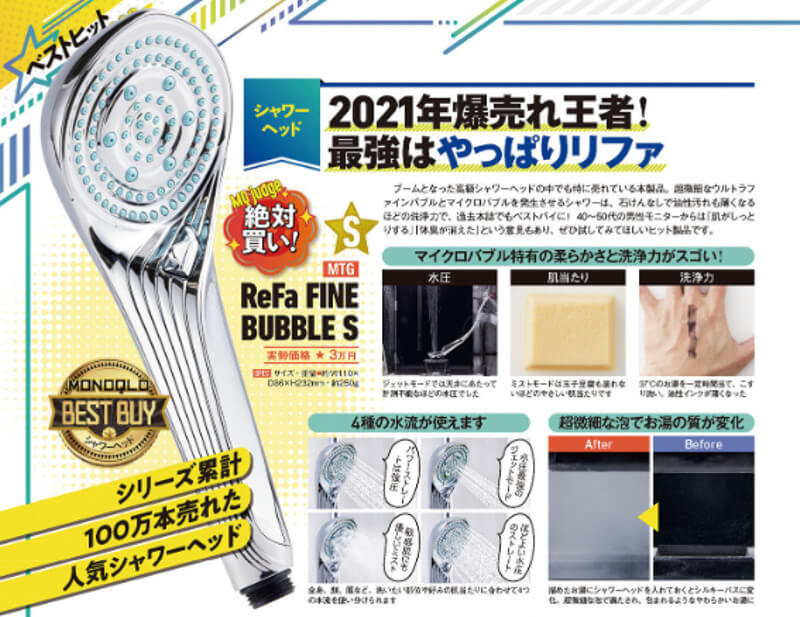
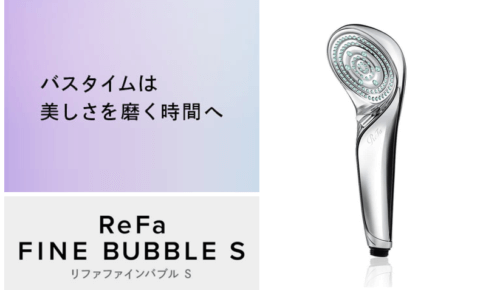
肌や髪の質が改善◎&体臭(ニオイ)も解決してくれる、心から推せるオススメ品です!
![](http://www.image-rentracks.com/neology/iekoma/300_250.jpg)